You can invite travellers by entering their details directly, or by importing them from an Excel (XLSX), CSV, or tab-delimited text file. Both approaches can be initiated from the travellers page.
On this page:
Step 1 - Selecting the Data Source
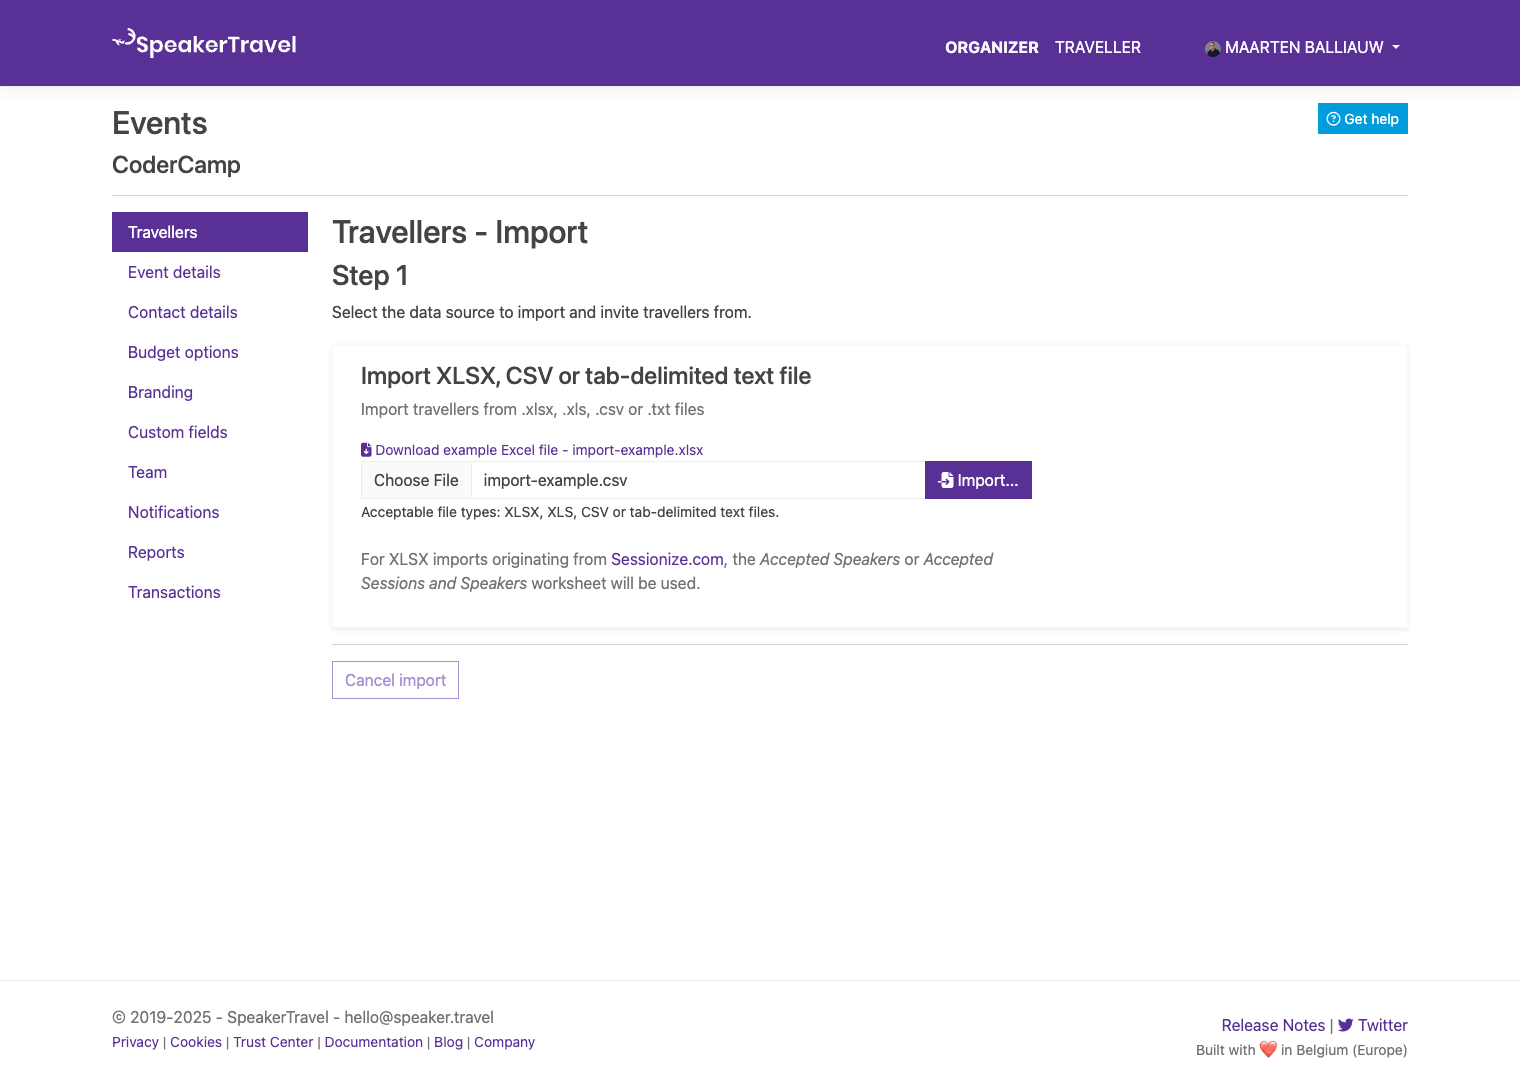
As a first step, you will have to upload the file containing the travellers you want to import and invite.
Supported file types are Excel files (*.xlsx, *.xls), as well as Comma-Separated Values (CSV) files (*.csv, *.txt).
An example Excel file with the correct headers is available to start with.
Ideally, the import file contains column header names with the following structure:
Name;Email;NearestAirportIataCode;BudgetAmount;BudgetOverrunPercentage;AllowedPassengers;AllowedBookingClass
Jane Doe;jane@example.org;LHR;250;10%;1;PremiumEconomy
John Doe;john@example.org;MUC;200;10%;1;Economy
Don't worry if the import file has different column headers, or no headers at all. You can map fields in the next step.
Step 2 - Import Settings and Field Mapping
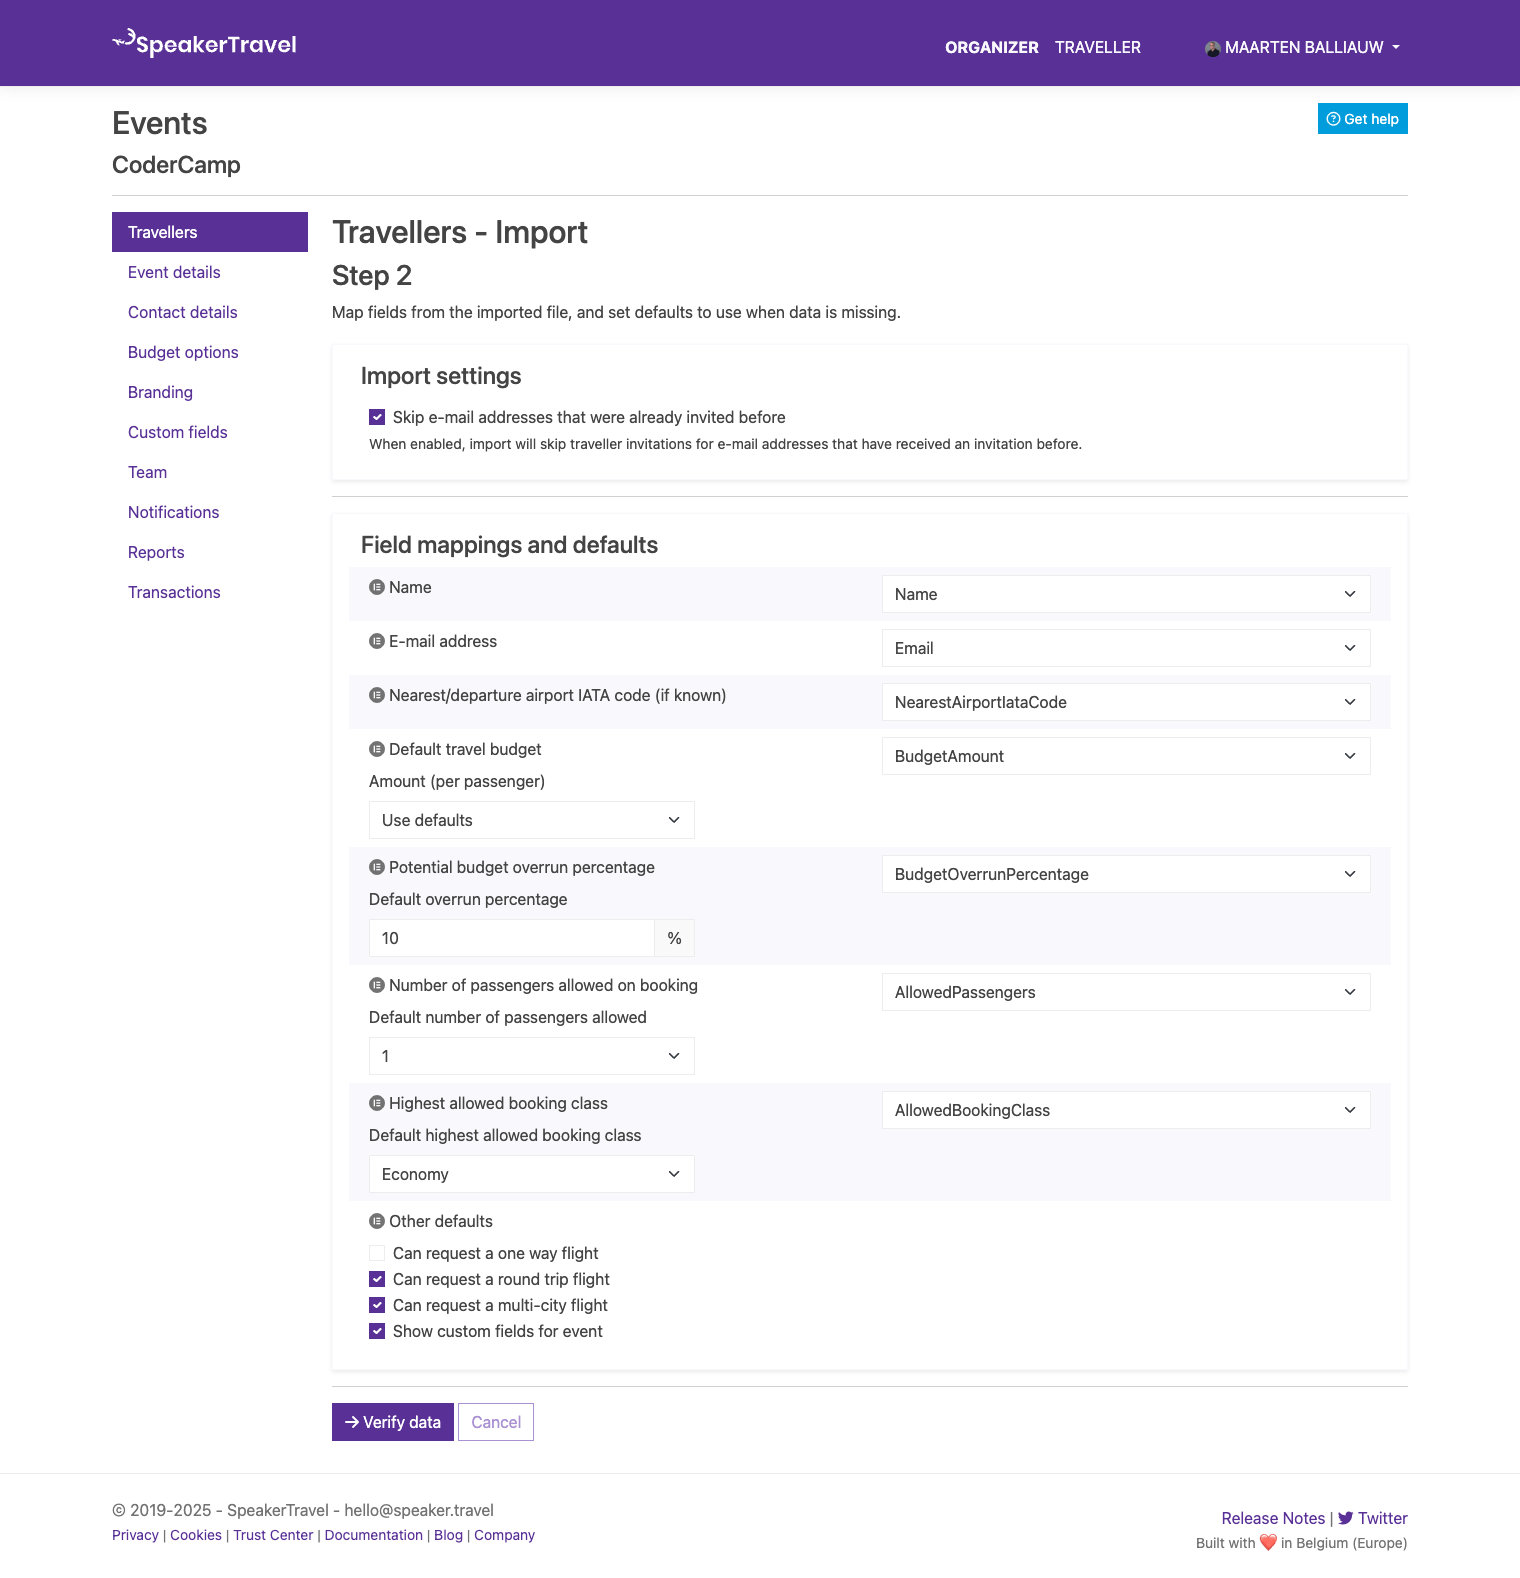
The next step involved in importing travellers for your event, is to map fields from the imported file, and set defaults to use when data is missing.
Note: For Excel imports, SpeakerTravel will always select the first worksheet as the data source. For Sessionize.com imports, the Accepted Speakers (or Accepted Sessions and Speakers) worksheet will be used instead.
By default, import will skip e-mail addresses that were already invited before. For example when importing data from a Sessionize.com export file, this will prevent duplicate invitations from being sent.
Next, you can map fields from your imported file to what they represent. SpeakerTravel will do its best to map fields automatically when possible, by recognizing column headers and data types. If needed, mappings can be updated manually.
All field mappings correspond to options available when manually inviting travellers. For options like budget amount, budget percentage, number of passengers allowed and highest allowed booking class, you can set defaults that will be used when the import file contains no data for them.
Step 3 - Verify Traveller Details and Send Invitations
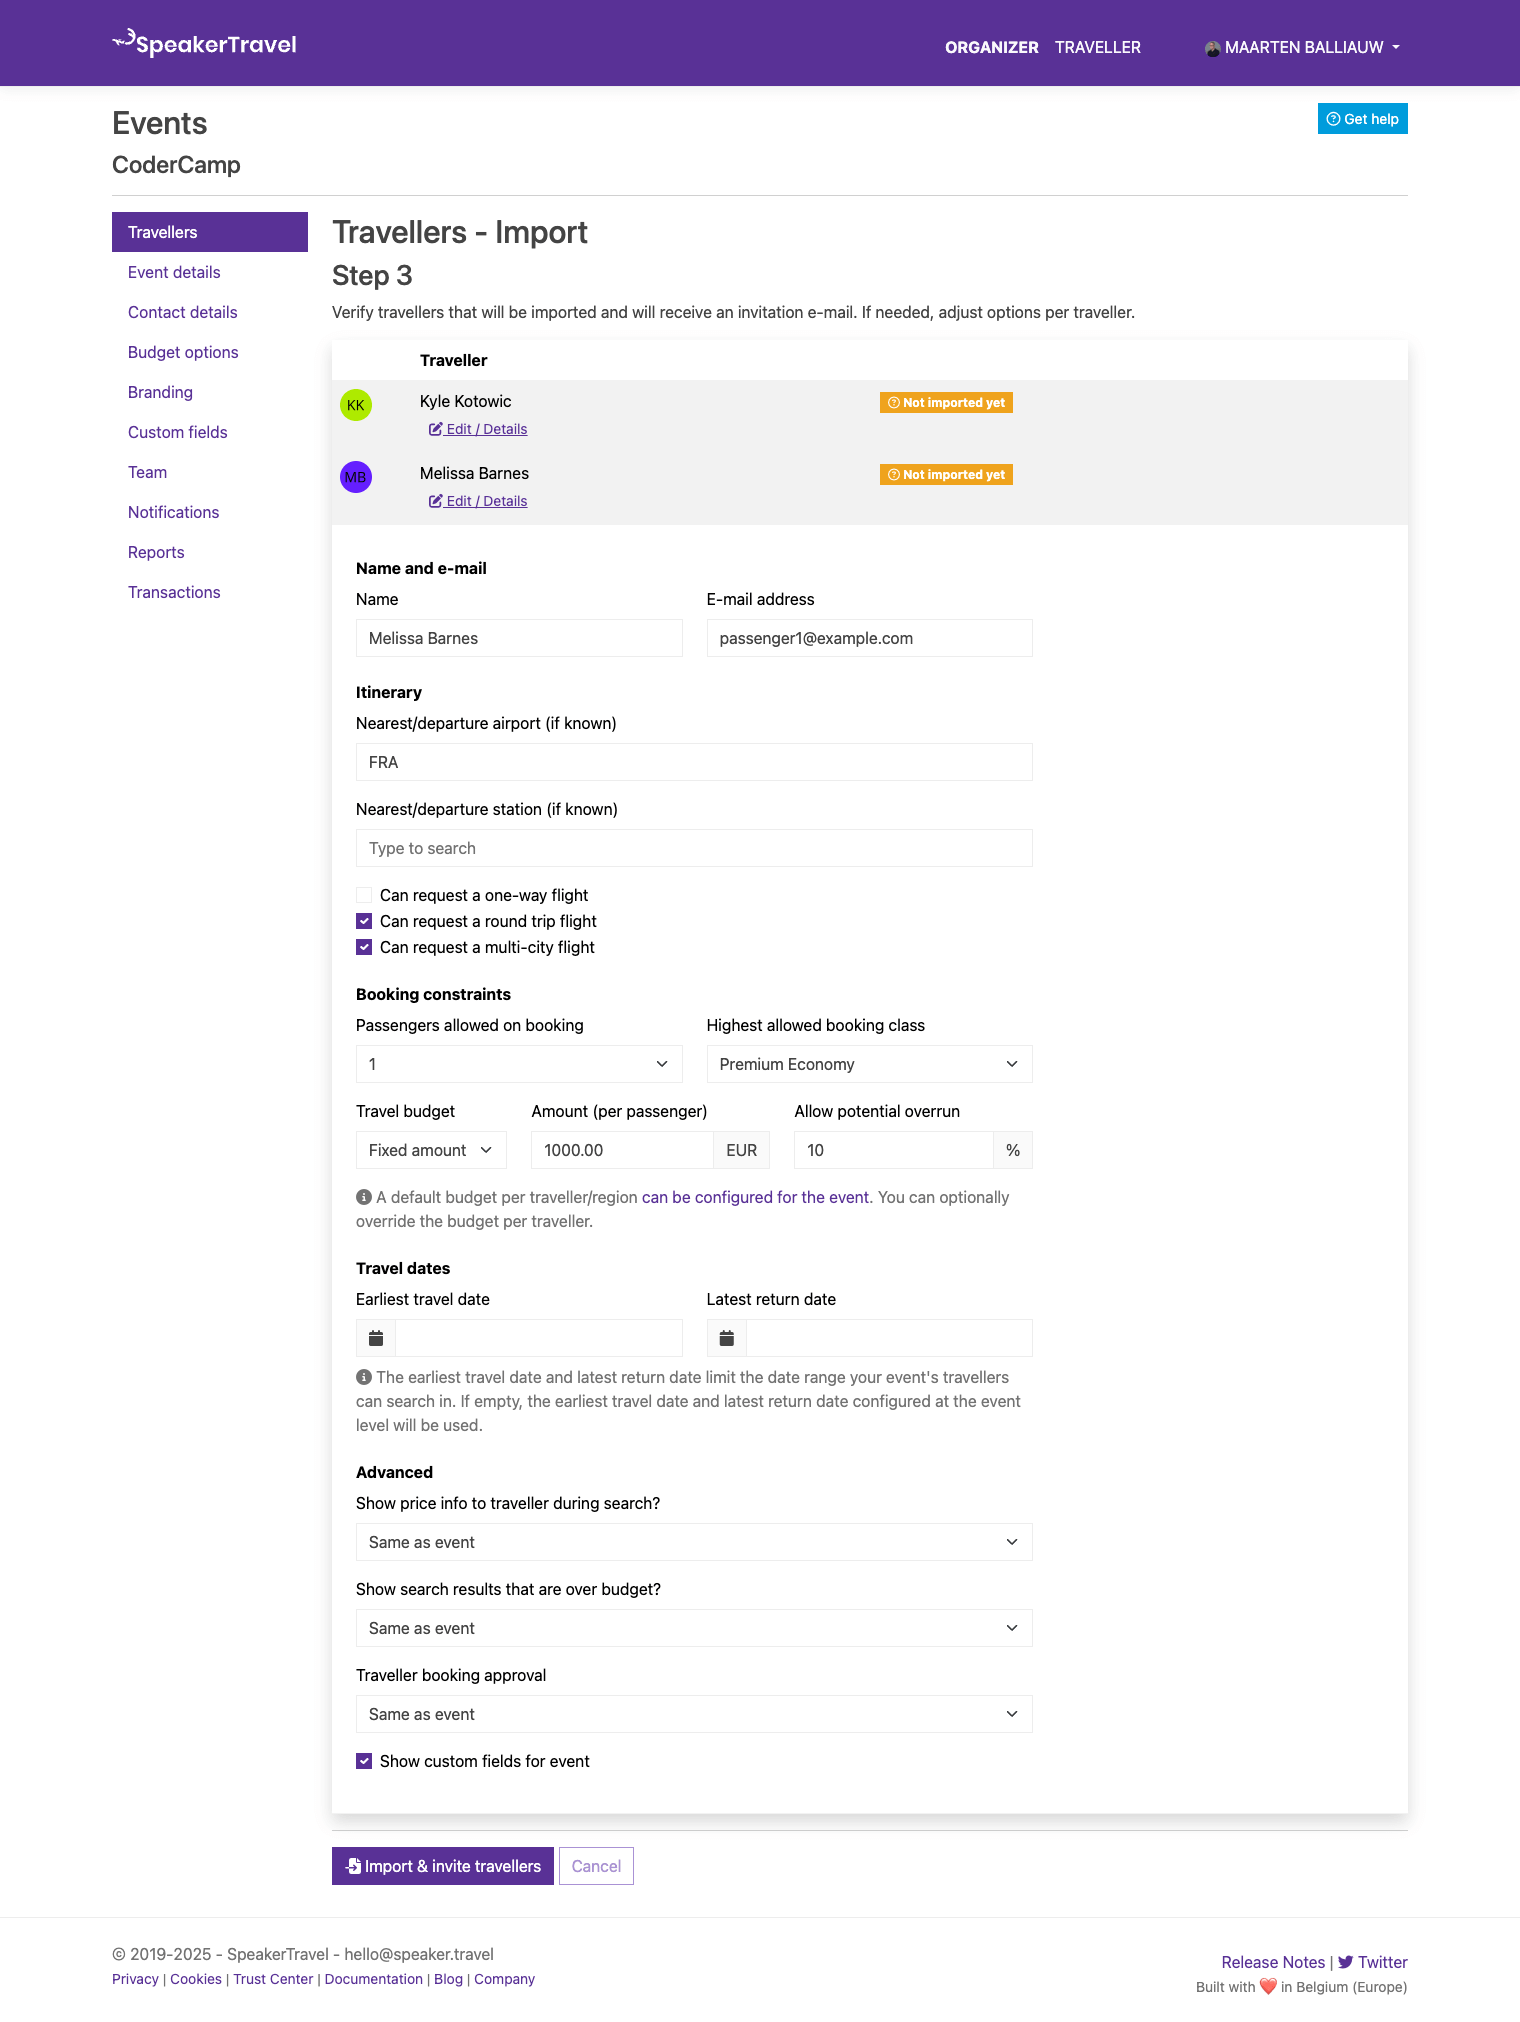
In the next step, the data that will be imported is listed. After you validate this data, it will be used to invite travellers. If needed, options can be adjusted per traveller.
If all data looks good to go, you can use the Import & invite travellers button to send out invitations for your event travellers.


