On this page:
List Travellers
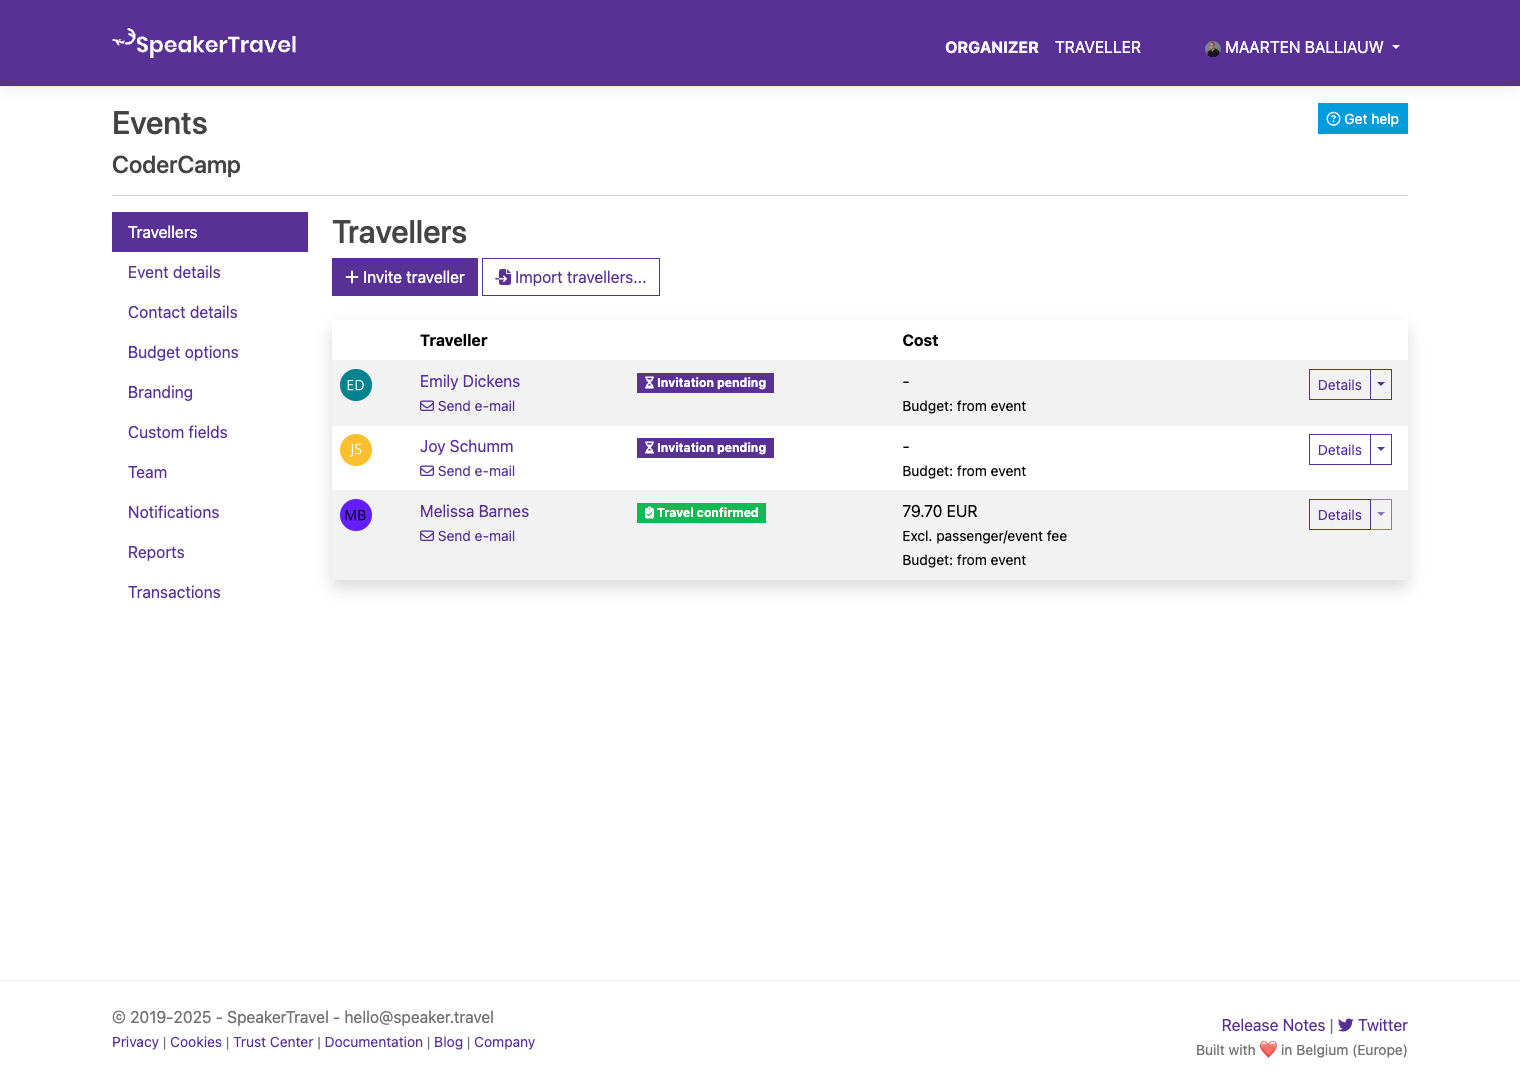
Once travellers have been invited, you can see all traveller invitations. The travellers list will show their status (invited, waiting for approval, confirmed, ...), and provides a quick overview of amount spent on fares vs. their budget.
From here, you can remove traveller invitations, as long as they have not been confirmed yet, and navigate to their travel details.
Invite Travellers
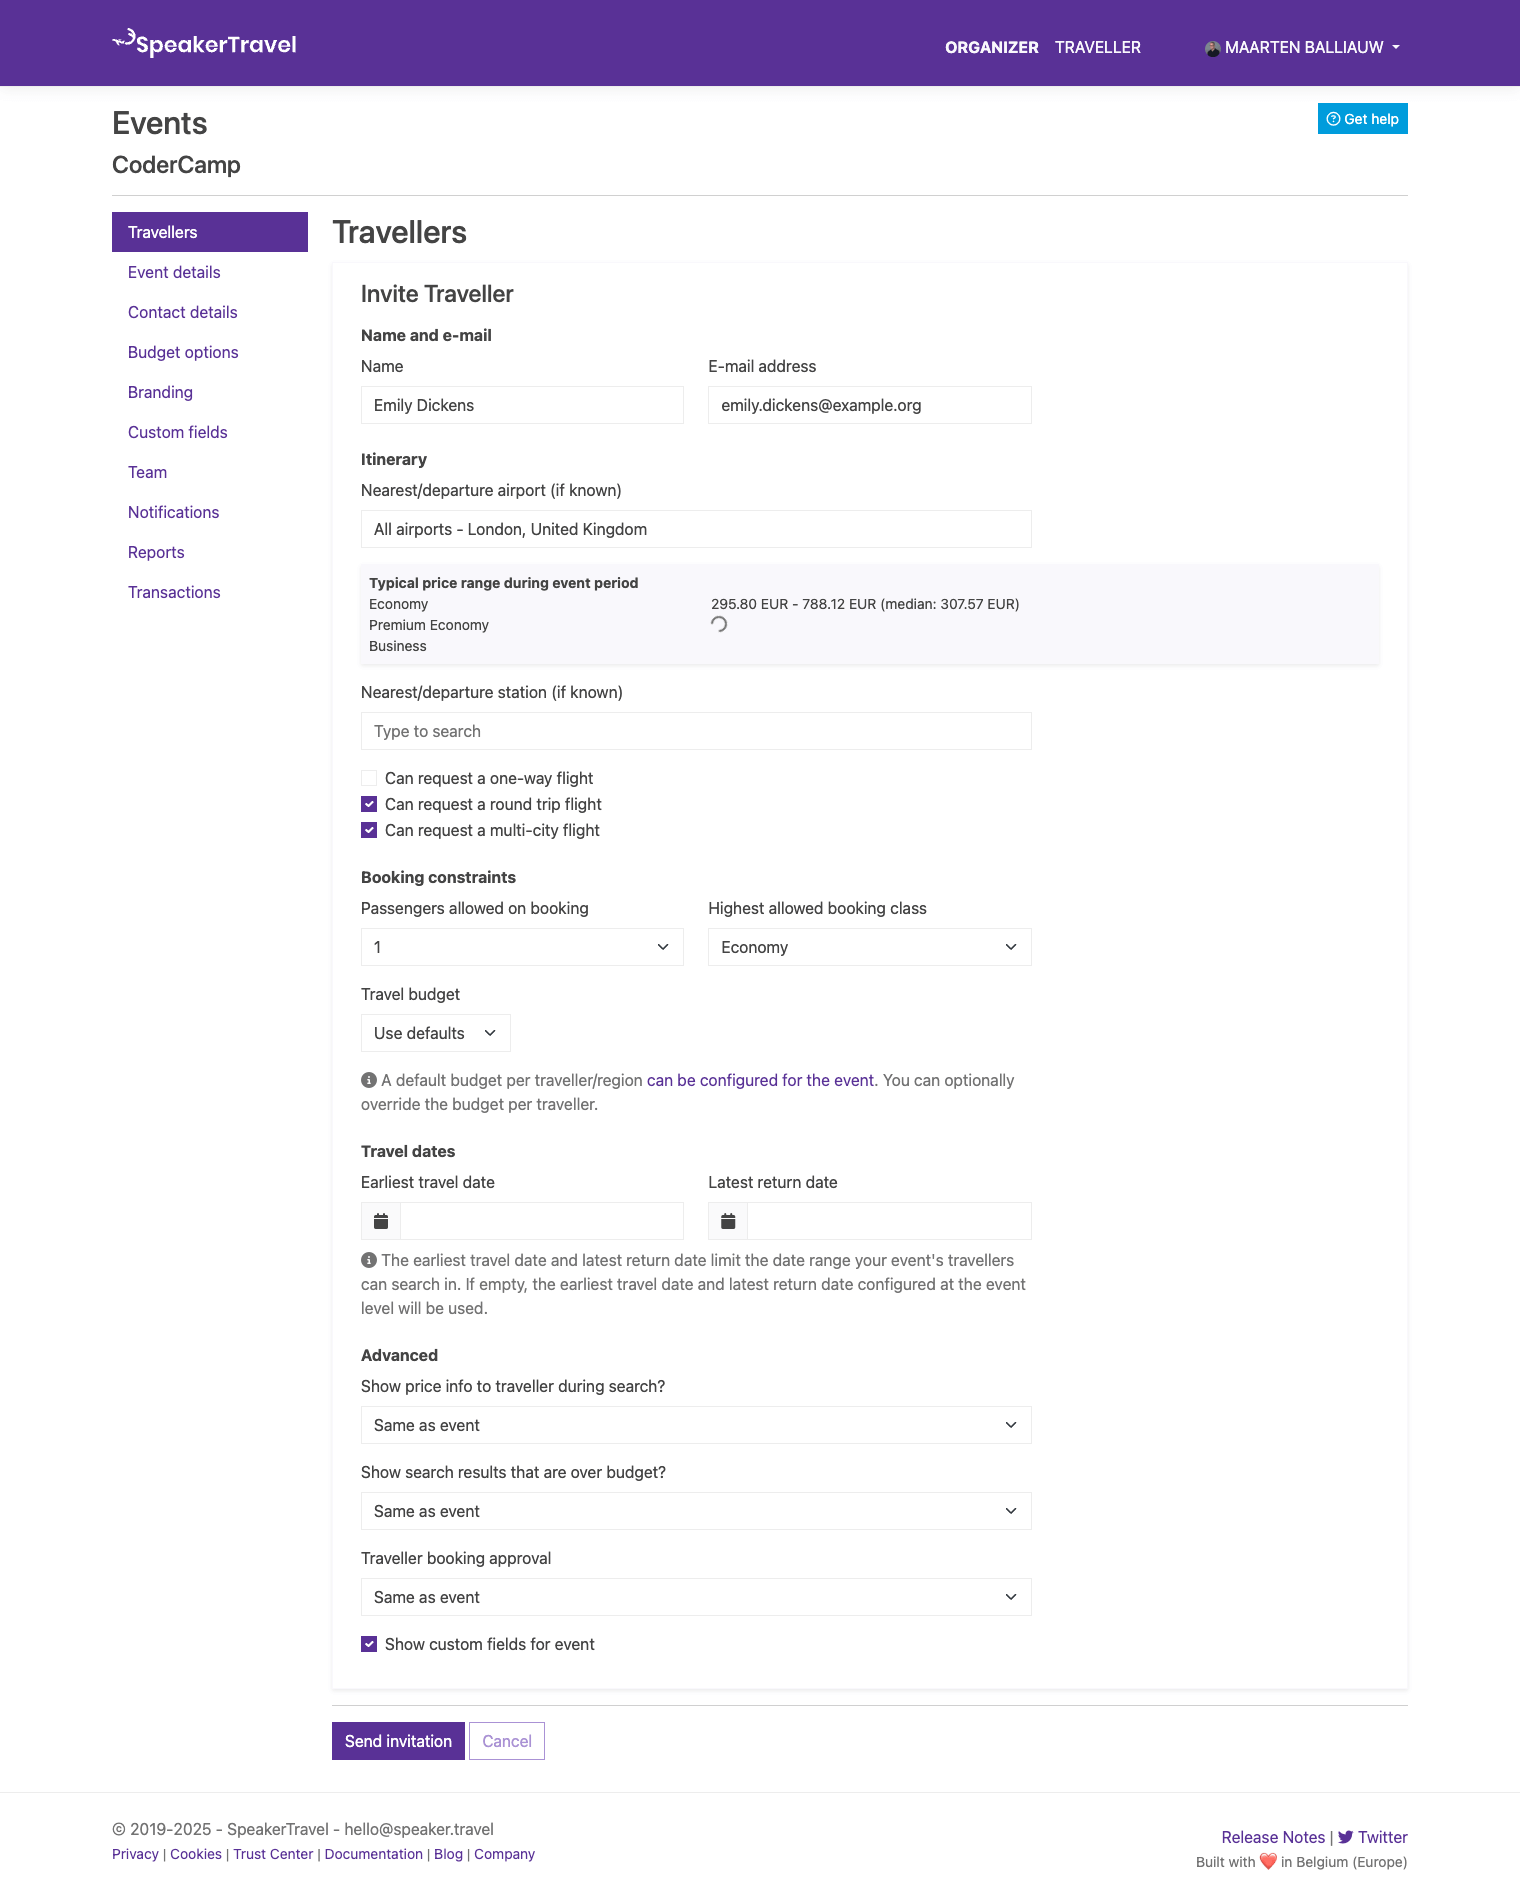
You can invite travellers by entering their details. At the minimum, you will need to specify the traveller's name and e-mail address.
Note: Travellers can also be imported from an Excel (XLSX), CSV, or tab-delimited text file. Importing travellers from Sessionize.com is also supported.
There are additional details you can specify, to make budgeting easier, and help the traveller with their travel search.
Each traveller will receive an invitation to start researching their journey. Invitation e-mails can be customized from the event branding options.
Tip: If a traveller hasn't accepted their invitation yet, you can copy the invitation link from their details page and share it via a separate communication channel (e.g., in chat or DM).
Nearest Airport
If known, you can specify the airport your traveller will be flying from. During their search, the departure and destination airports will be pre-populated, making it easy for them to get started.
Specifying the nearest airport will also retrieve typical price ranges for economy, premium economy and business flight fares during your event. By having the minimum, maximum and median flight fares at your disposal, setting the budget for your traveller becomes easier.
Nearest Station
If known, you can specify the train station nearest to your traveller. During their search, the departure and destination stations will be pre-populated, making it easy for them to get started with their search.
Budget
For every traveller, the default budget configured for the event is applied.
You can override the default budget per traveller:
- Use defaults – Use the budget specified at the event level.
- Fixed amount – Specify a budget amount, and an allowed budget overrun percentage.
- Any amount – Effectively disables the budget for this traveller.
SpeakerTravel will only show travel options that are within the budget (+ overrun percentage) during search.
Maximum Booking Class
Each traveller can be assigned a maximum booking class. This will prevent travellers from booking business class tickets if the event only allows for economy fares.
Number of Passengers
By default, only one passenger is allowed per booking. This can be increased up to 4 passengers.
For example, if a traveller's partner is also joining, this would allow the traveller to book their trip at the same time. Note that in such scenario, the event owner will have to arrange for optional reimbursement with that traveller.
Travel Dates
If needed, you can set the earliest travel date and latest return date for an individual traveller.
The earliest travel date and latest return date limit the date range your event's travellers can search in. If empty, the earliest travel date and latest return date configured at the event level will be used.
Advanced Options
Travellers will not see fare price information while searching. Optionally, you can show price info to a specific traveller, or to all travellers of your event.
Each booking request has to manually be approved by the event owner. Optionally, you can auto-approve booking requests for a specific traveller, or for all travellers of your event when the request is within budget.
An event may collect additional data using custom fields. For a specific traveller, you can show (default) or hide the custom fields during booking.
Book on Behalf of a Traveller
If you already know who needs to travel, you can book flights or trains on behalf of them, without sending an invitation first. From the list of travellers, use the New booking... button, and enter the traveller's name and e-mail address (both are required).
Each booking you create this way is added as a new traveller, so you can create as many bookings for the same person as you need. If the same person (same name and e-mail address) is already in your list with the status Awaiting selection, that traveller is used instead of adding a duplicate. No invitation e-mail is sent to the traveller. The traveller is added to your list right away. If you don't complete the booking, they stay in your list as Awaiting selection.
For travellers who are already in your list with the status Awaiting selection (for example, because they have not yet made their travel selection), you can also choose Book on their behalf from the Details menu on their row.
Next, search for flights or trains (use the tabs on the search page to switch between them), pick an option, and fill out the passenger details. Clicking Book now books the trip and charges your event immediately. There is no approval step.
Budget and travel policy warnings are shown, but they never block you from booking. The passenger receives the booking confirmation e-mail with their itinerary. Because travellers created this way don't have a SpeakerTravel account, this e-mail does not contain a link to view the trip in SpeakerTravel or a check-in link; ask them to contact you if they need changes.
If your event's balance is insufficient, the booking is not made. Instead, it is kept as Awaiting approval, so you can approve it from the traveller's details page once the balance has been topped up.
Note: Booking on behalf of a traveller requires that booking is enabled for your event, and that you have permission to approve bookings.
Traveller Details
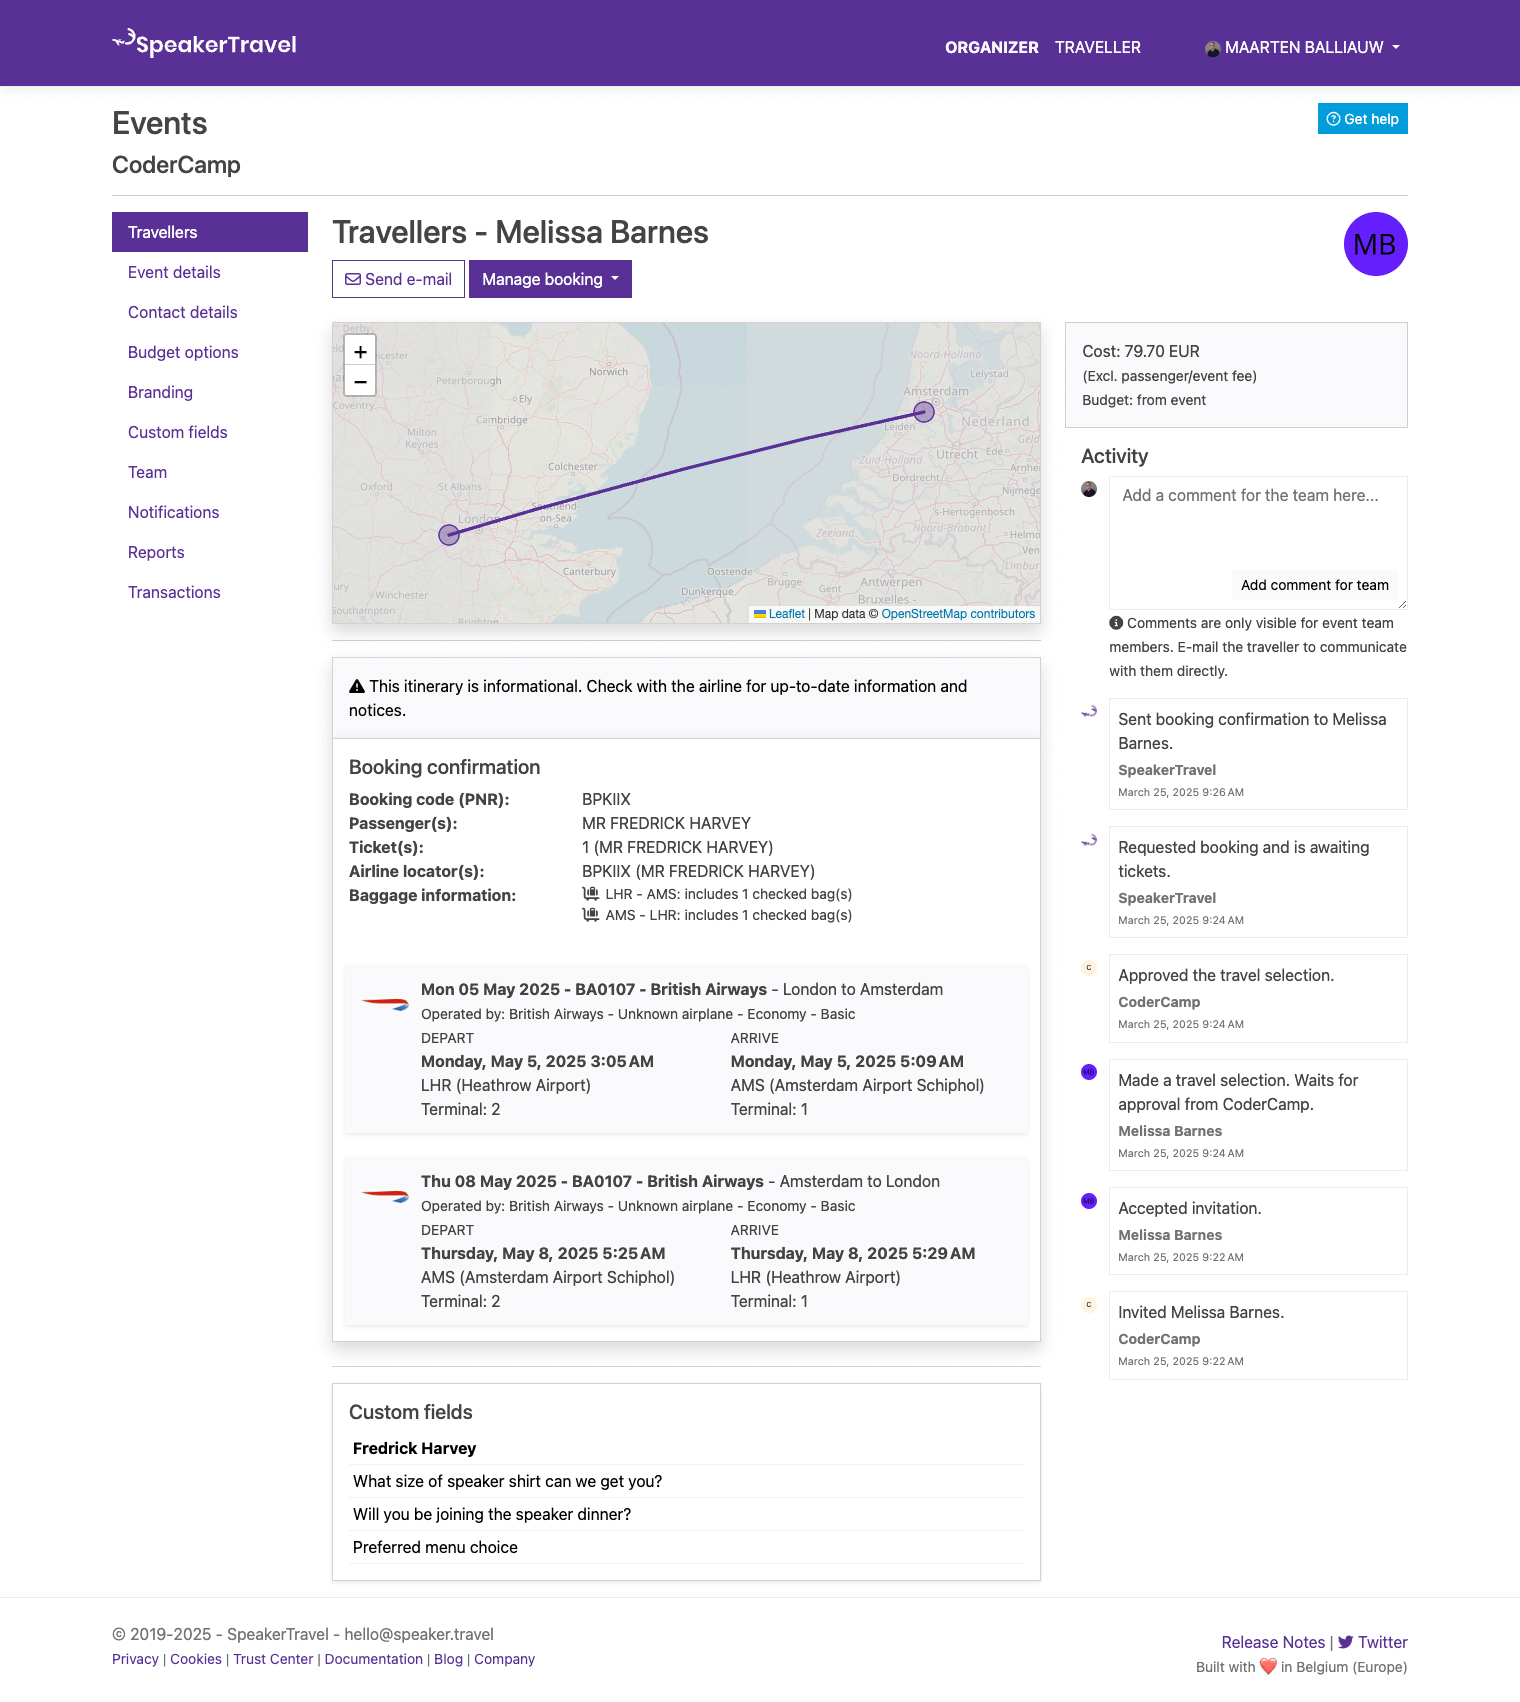
For each traveller, you can navigate to their trip details. Depending on the status of their booking, you can see the traveler status, activity history, add comments to the activity history, and more.
You'll also be able to approve/reject their booking request, or view their travel itinerary.
Approve/Reject Booking Request
The event organizer will receive a booking approval request, once the traveller finishes their search.
As an organizer, you can review the selected flight(s) and train(s), booking class, and price information.
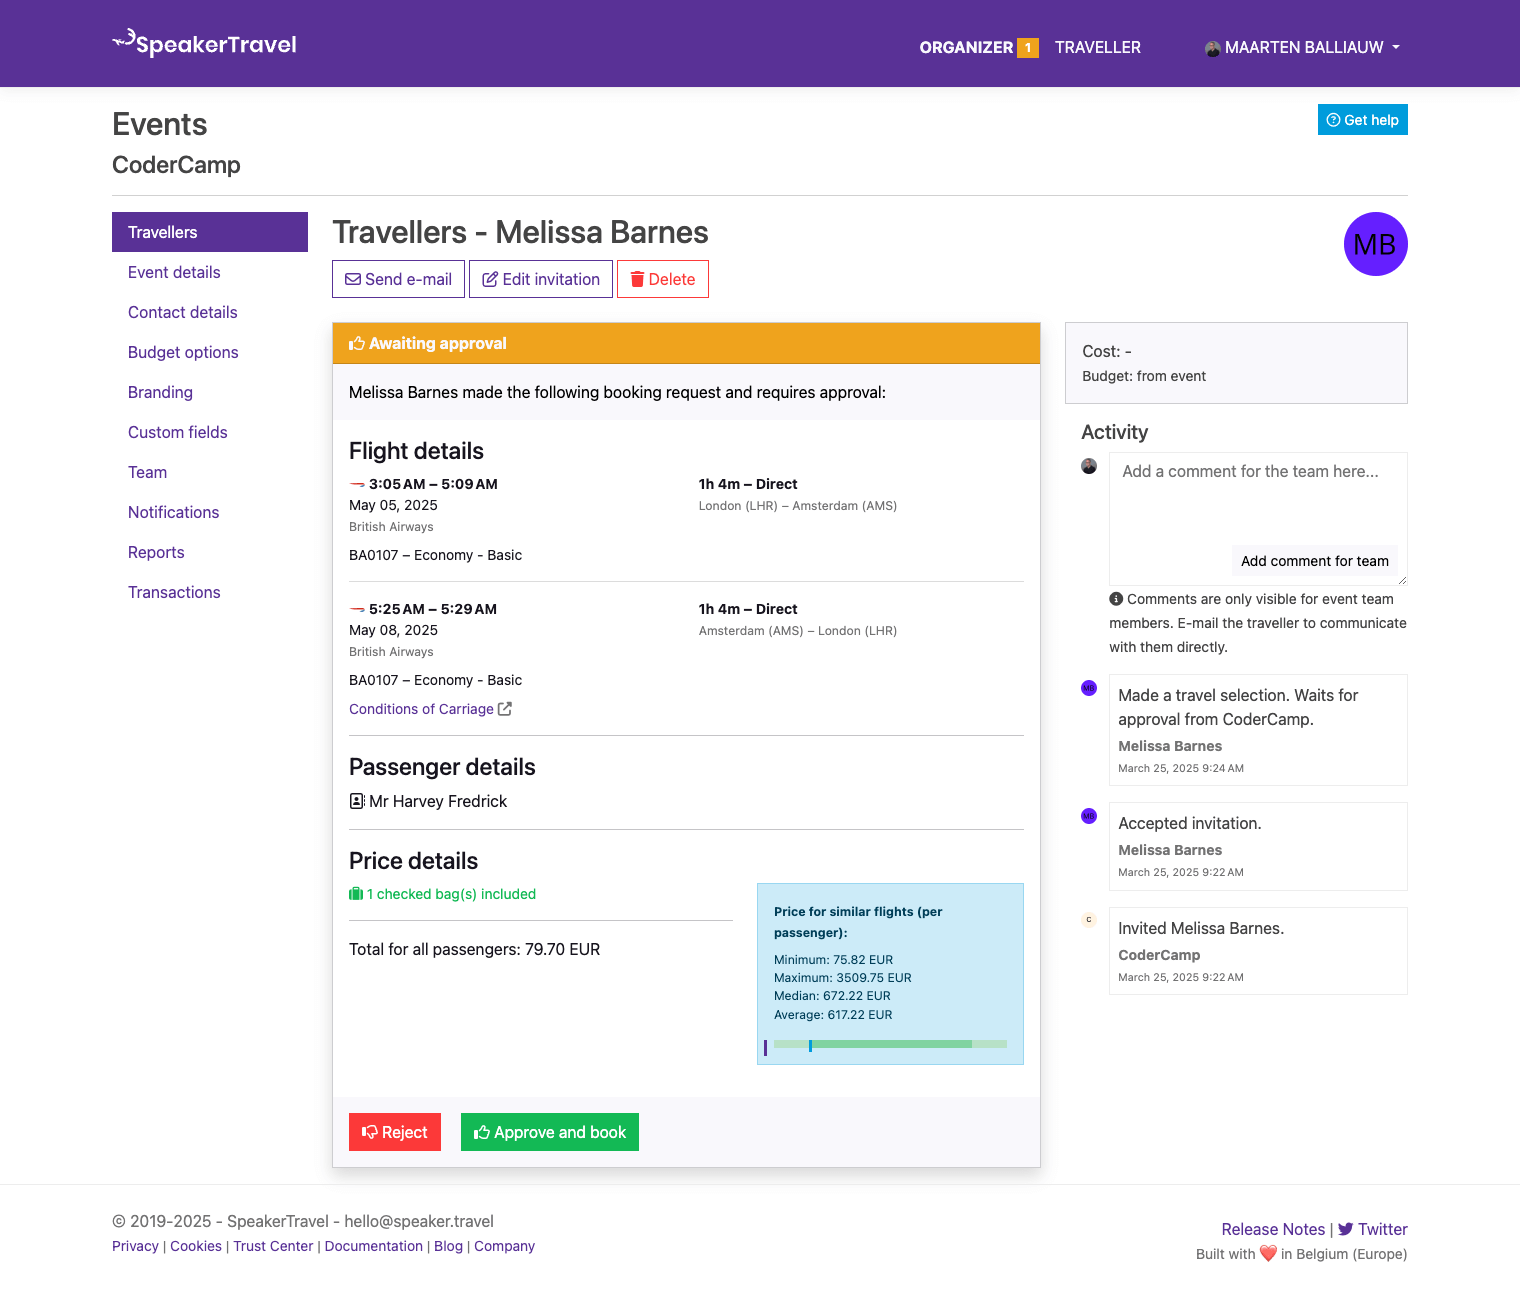
Next, you can approve the booking request. This will book the selected trip, and send ticket information and a travel itinerary to your traveller.
Note: Auto-approval of booking requests further reduces the work required for event organizers. This can be configured at the event level.
If needed, a booking request can be rejected. After specifying the reject reason, the traveller will be invited to make a new search.
Update Booking Request and Search Alternative
When you receive a booking request for your event, you may not want to approve the requested travel options but instead update the booking request with another option and search alternatives.
The Search for Alternatives button allows you to perform flight or rail searches and request another option on behalf of a traveller.
Note that as an organizer, you will still need to approve the new booking request, ideally after consulting with your event traveller.